
Howdy and welcome to a new series on ergonomic mechanical keyboard design! Over the course of the next few articles, I'm going to walk through the process of creating an ergonomic keyboard design from scratch using the Ergogen keyboard layout generator. The end result will be a PCB design file we can finish in KiCAD before sending off to a PCB fabricator.
Ergogen is a one of those passion project that has really grow into its own. It began as a tool to aid Dénes Bán in the development of his Absolem keyboard. After aiding Bán in the creation of one specific keyboard, but he suddenly found himself in possession of a tool that could allow anyone to create any keyboard layout. Over the course of the next three years, Ergogen has evolved from an opinionated set of scripts for one user to a project with a dedicated following.
The keyboard designed in this series will be the second full keyboard I've created in Ergogen. I'm by no means as prolific as a Ben Vallack in this space, but I enjoyed the process of creating my first keyboard enough to put a bit of extra work in when it came to documenting the creation of this next one. This is by no means meant to be a set of comprehensive documentation for Ergogen, and is instead designed primarily to give readers a basic understanding of what the tool's like to use.
I have been planning writing this set of articles for a while now. Ergogen's a nice piece of software to work with, but it can have something of a rocky onboarding process. Depending on what you're looking to do, you often need to reference the tool's documentation, various YouTube guides, and an assortment of best-practice GitHub repos. I'm still carrying a torch for long form written how-tos, but what really lit a fire under me was the release of Ergogen v4.
Ergogen v4 made several breaking changes to Ergogen's syntax. Now in addition to piecing together the required info, you also need to parse those pieces through the v4 migration guide. It's a lot, and I know I would have appreciated an end-to-end example when getting started with Ergogen.
So here you go.
A Bit Of Background

Let's back up for a second. This series is a design guide for how to create your own custom ergonomic mechanical keyboard. If you're not quite sure what those are, I recommend taking a look at my review of the Sofle Choc keyboard. The review is ostencibly about one specific keyboard, but the writeup ballooned in scope and the first half serves as a general zero-to-ergonomic-mechanical-keyboards introduction.
Most importantly, it covered many of the aspects that seperate standard mechanical keyboards from their "ergonomic" counterparts. Ergogen is an opinionated tool, and it's designed primarily to create ergonomic "column stagger" layouts. That is to say, keyboards where all of the keys in a particular column (1-Q-A-Z, etc.) are aligned together in a straight line. You can technically force Ergogen to do a classic row stagger, but it's not what it was built for and other tools may be better suited for traditional keyboard layouts.
So if some of the terms used in this guide seem a bit confusing, I highly recommend going back and checking out that Sofle Choc review. Additionally, /r/ergomechkeyboards is a good resource to discover what's going on in this particular niche of clacky keyboards. Like most things in 2023, Ergogen also has an active Discord for specific questions.
So What Is Ergogen?
Whoops. I probably should have explained that earlier. Ergogen, as per it's Github page, "aims to provide a common configuration format to describe ergonomic 2D layouts and generate automatic plates, cases, as well as un-routed PCBs for them." In it's most simple form, Ergogen is a set of scripts designed to turn text files into keyboard design files. You give it a config file describing a keyboard, and it will output a trace-less PCB file and some .dxf / .stl files you can use to get started when creating a case. Ergogen is designed to get you out of graphical CAD tools and fiddly alignment controls, letting you focus on parametrically defining a keyboard layout down to the last millimeter.
Ergogen config files are based on YAML. For the uninitiated, YAML is a data-serialization language designed to allow actual human beings to author structured data without having to spend too much time fussing around with brackets and quotation marks. (You may know it as "Yet Another Markup Language", although they've recently pivoted to "YAML Ain't Markup Language" to emphasize its focused on structuring data instead of documents.) If you have familiarity with formats like JSON, you should feel right at home with YAML. Just know that in lieu of brackets, YAML uses indentation to indicate grouped blocks of data. If you start getting errors, make sure to double check your tabs or spaces.
Once you have your Ergogen .yaml file ready to go, you need some way to process it. Ergogen is a NodeJS based project, which means it's fairly straightforward to get it running locally on your machine. Once you have Node installed, you just need to run the Node Package Manger's install scrip on your local command line with npm i -g ergogen. After that point, you can parse your local Ergogen file with ergogen input.yaml -o output_folder.
If you don't have Node installed or are generally weary of command lines, there's also a web-based version of Ergogen. This site lets you paste in an Ergogen config file and then download the generated outputs right from your browser. Ergogen community member Cache and Ceoloide have done an excellent job of adding live previews to ergogen.xyz, letting you quickly itterate through layouts during the early parts of your design process. This site has been updated to Ergogen v4, so even longtime Ergogen enthusiasts are starting to make the pivot to the new syntax changes.
Update: Ceoloide's done an incredible job of updating the web based version of Ergogen. It now features the ability to import external footprints, KiCAD previews, Github integration, and more. Previous versions of this guide referenced the ergogen.ceoloide.com version of the site, but all of his changes have been rolled back into the official ergogen.xyz site.
The Anatomy of an Ergogen Config
Creating a new Ergogen config is as simple as opening ergogen.xyz and clearing the text on the left side of the screen. You can also open up your favorite text editor and create your-keyboard-name.yaml. (It's alright, I can give you a minute to think a good name for your new board.) Even if you're going to use the web versions, it's a good idea to save your files offline when you're done tweaking it. The web page will try to keep your edits stored locall in your browser, but you never want to lose hours of work if something goes wrong.
Ergogen has five primary sections:
Units (Covered in Part 1)
This is a short section of your Ergogen config where you can define custom units. If you find yourself constantly using the same numbers over and over in your config, this is where you can assign a variable to them.
Points (Covered in Part 1)
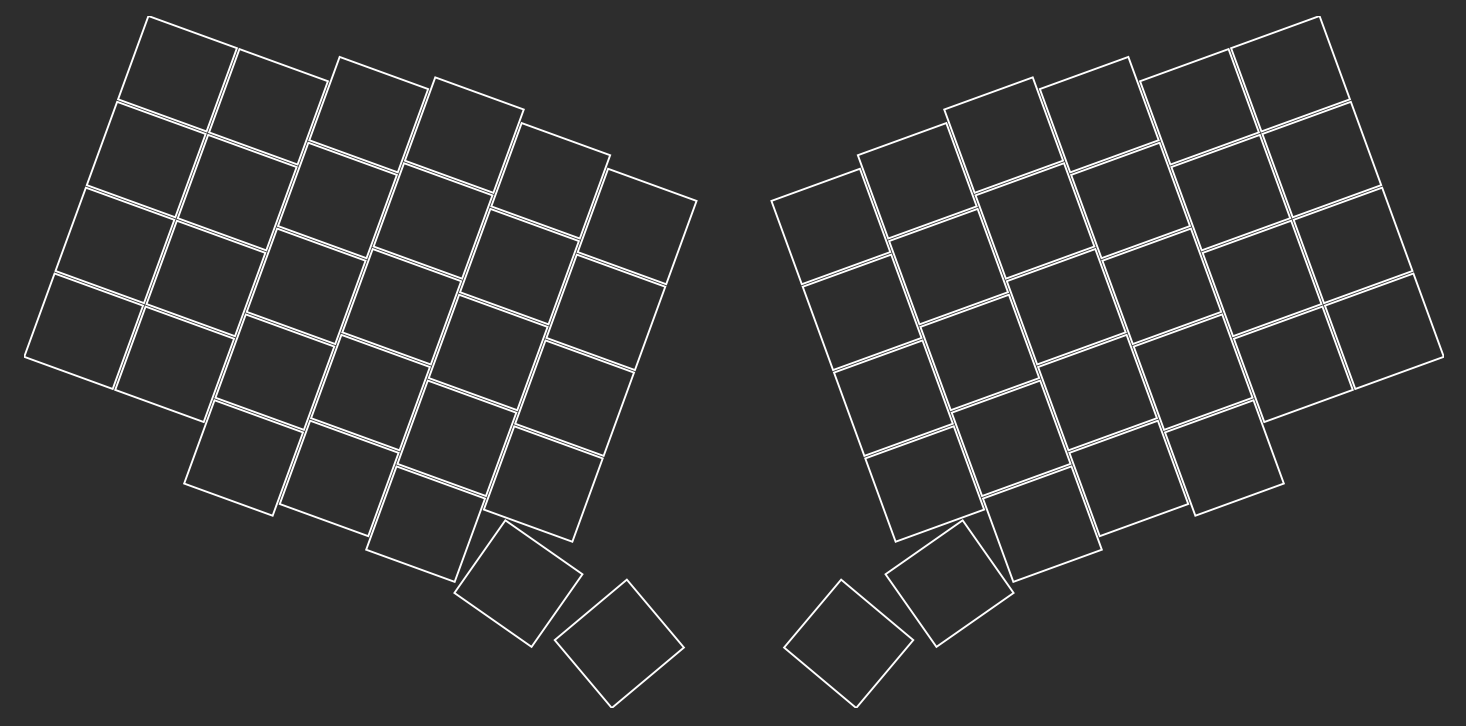
Points is where the real magic happens. A "Point" in Ergogen is the [x,y] position of a single key. So the "Points" section is the place where you actually get to define the custom layout of your keyboard. Rather than having to set an explicit [x,y] position for every key on your board, Ergogen has custom definitions for quickly creating entire columns, rows, and thumb clusters.
Points themselves aren't saved as an Ergogen export, but are used as references for the next few sections.
Outlines (Covered in Part 2)
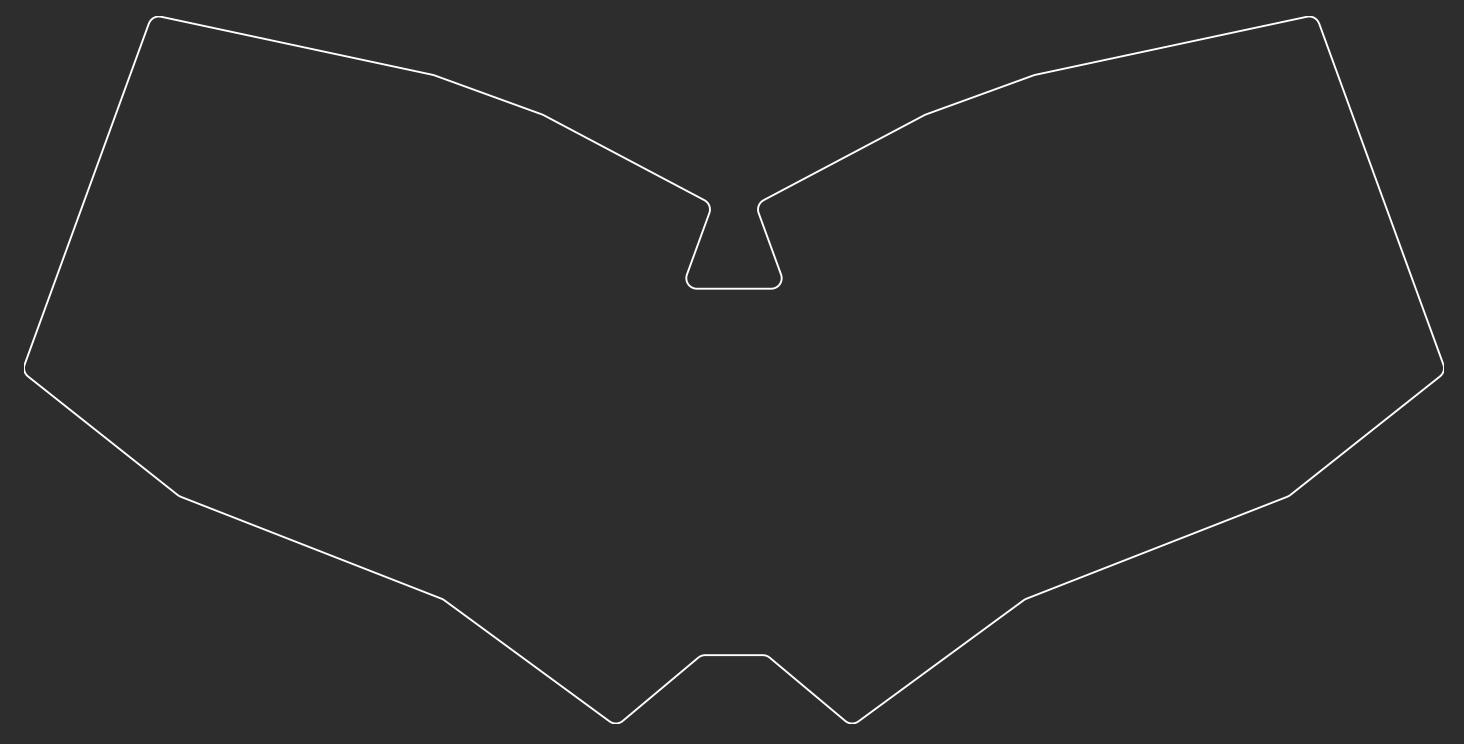
The Outline section allows users to define the shape of their keyboard. This is done by creating a variety of vector shape definitions. These outlines can reference the points we created earlier, so it's simple to define a shape such as, "Draw a border around all my keys with a 3mm padding on each edge." The outlines defined in this section can be referenced later on by both the PCBs and Cases sections.
Outlines can also be exported by Ergogen as .dxf files that can be use in graphics or CAD applications.
PCBs (Covered in Part 3)

If Points are where the magic happens, PCBs are the star of the show. Creating a circuit board we can send off for manufacturing is the whole reason we're here after all. The PCB section has a few different things going on. First of all, you need to import an outline to give shape to the new PCB. Next you need to assign a variety of component footprints. The Points section defines where each key should go, but we still need to specify what sort of key switch footprint we need on the board. This is also where we can add component definitions and footprints for other parts like the microcontroller and its reset button. Finally, we'll need to define the "Nets" for our components. These are definitions used by the PCB to indicate that Key A needs to connect to Pin B.
PCBs are exported by Ergogen as a KiCAD PCB file. KiCAD typically uses a "Project" structure to organize files. These projects will often include a schematic file defining how components are designed to connect in addition to the PCB file. Since Ergogen has already handled defining these nets, it foregoes the project file and the schematic and only exports the KiCAD PCB file.
Cases (Covered in Part 4)
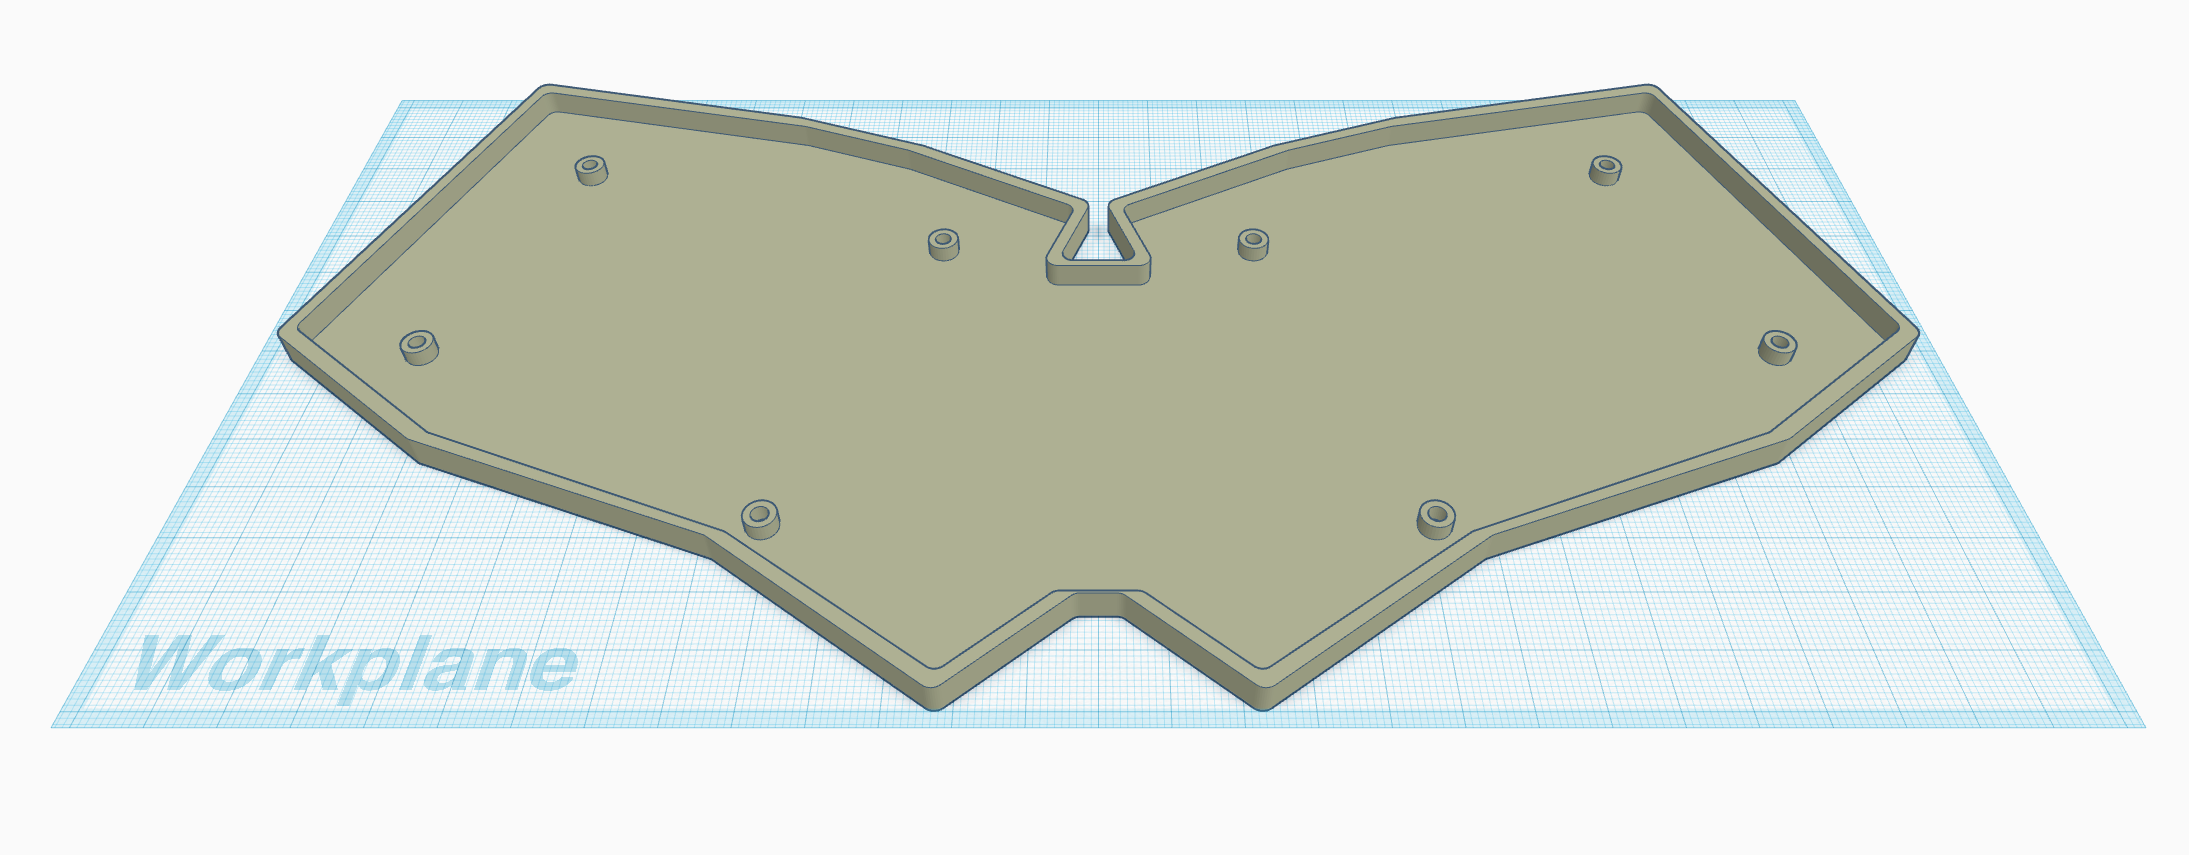
This last section is entirely optional. Many custom keyboard designs will rely on a bare PCB and apply rubber bumpers directly to the bottom of the circuit board. If you have access to a 3D printer though, it can be nice to add a bit of color and stability to your design. The Cases section allows you to add depth to any of your outlines. You simply define how tall you want the piece to be, and Ergogen will create the associated 3D model.
There are some basic operations for adding and subtract case parts from one another. For example, you can define the bottom plate of your case, define several screw holes, and then subtract the screw hole portions from the bottom plate.
Ergogen v3 previously exported cases files in the .stl lingua franca format of 3D printing. Due to some technical issues with the .stl file creation library, v4 is currently exporting cases as .jscad files. If you'd like to convert these into .stl files, you can use sites like openjscad.xyz or their NPM package.
What Ergogen Doesn't Do For You (Covered in the Finale)
At the end of this process, you'll have an unrouted PCB file. If you've never made a PCB before, routing is the process of drawing traces to connect two points on a circuit board. All those lines criss-crossing a PCB are physical electrical wires. Most importantly, they can't overlap or cross one another.
For geeks who typical work in code, the realities of physics placing limitations on one's project is a jarring discovery. Automatic routing tools exist, but they often come with their own issues or are part of paid CAD software. Connecting all of the components on one's keyboard is like trying to solve a hundred wandering salesmen problems on something slightly larger than an index card.
After Ergogen's done its work, you'll need to roll up your sleeves and start routing your circuit board in KiCAD. KiCAD is a capable piece of open source CAD software, but it's not without its own learning curve. If you used some early versions of GIMP or Inkscape, you'll have a rough idea for the sort of UI you're in for.
Once you've finished routing your board, you can send it off to a PCB fabrication service. KiCAD supports exporting to the industry standard Gerber file format, so you shouldn't have any trouble getting your new keyboard manufactured. Unless you really shell out for express shipping it will take about two weeks for you to receive your new PCBs. That time is in line with many keyboard part sellers, so you can order all the switches, microcontrollers, and keycaps you need at this time.
The last step is creating a keyboard firmware for your new board. The QMK and ZMK open source keyboard firmwares use the same column and row matrix approach as Ergogen so it shouldn't be too difficult to get your new firmware created. There's plenty of existing configurations to reference, and you've got plenty of time to tackle the firmware while your PCBs are waiting to arrive.
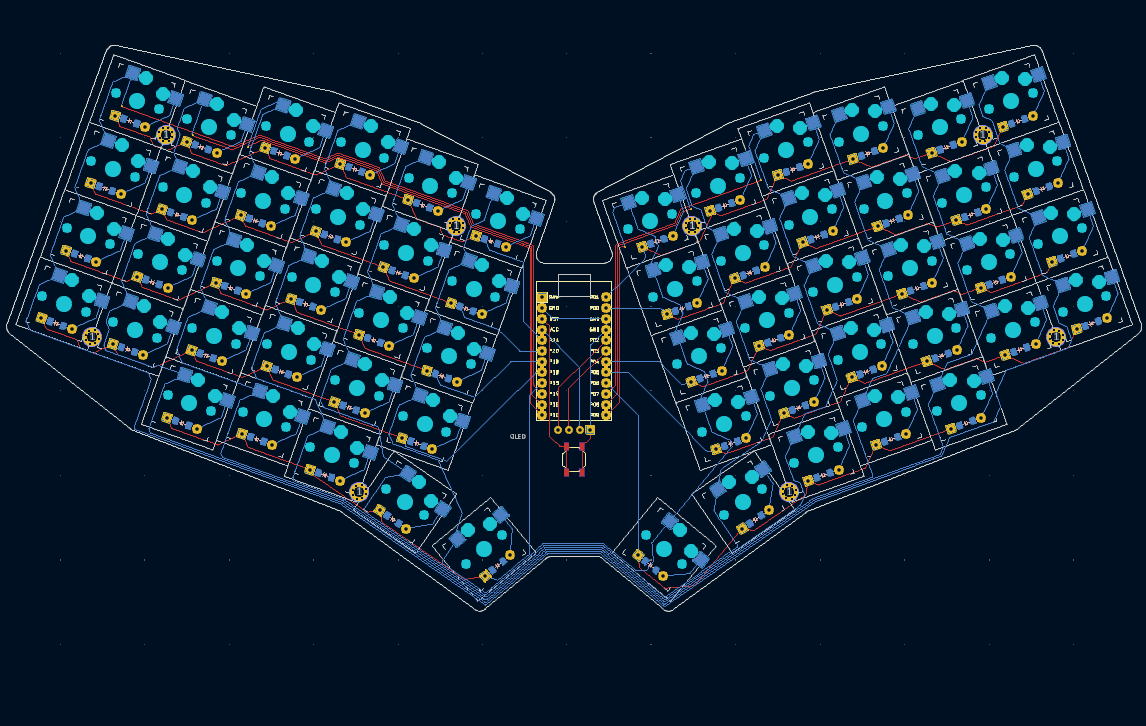
What I'll Be Building In This Guide
Good artists borrow, and great artists steal. In this guide, I'm going to be creating a keyboard loosely based off Josef Adamčík's Sofle keyboard. It's a 6x4+5 column staggered layout that I've grown quite fond of, and should be a useful layout to mimic when showing off Ergogen's features. While the Sofle Choc offers a Choc switch compatible version of this keyboard, there isn't a Choc spaced version of the Sofle yet. So this guide's a totally selfish excuse for me to recreate this board with Choc spacing and claim it was for site content. (Update: Adamčík's working on a unibody Choc-spaced Sofle variant now!)
Now that you know what we'll be tackling, let's hop into Ergogen and get started. I'll see you over in Let's Design A Keyboard With Ergogen v4: Units & Points (Part 1).